Creating Personal Monuments with Tinkercad and 3D Printing
April 09, 2025
This is the story of my first experience 3D printing with students in my kids’ school, and some thoughts on what you can do if you want to try it too. We helped a whole class of sixth-graders to design, model, print, and paint their own personal monuments, all in just a week or two.
These timelapses show the creations emerge from the printer
Here’s what happened. In January, my son’s middle school social studies teacher mentioned that she’d like to explore 3D modeling with her class. They had been studying the legacies of powerful rulers throughout history. Many societies create lasting monuments to venerate their leaders - from as far back as the pyramids up to statues found in public parks in modern cities.
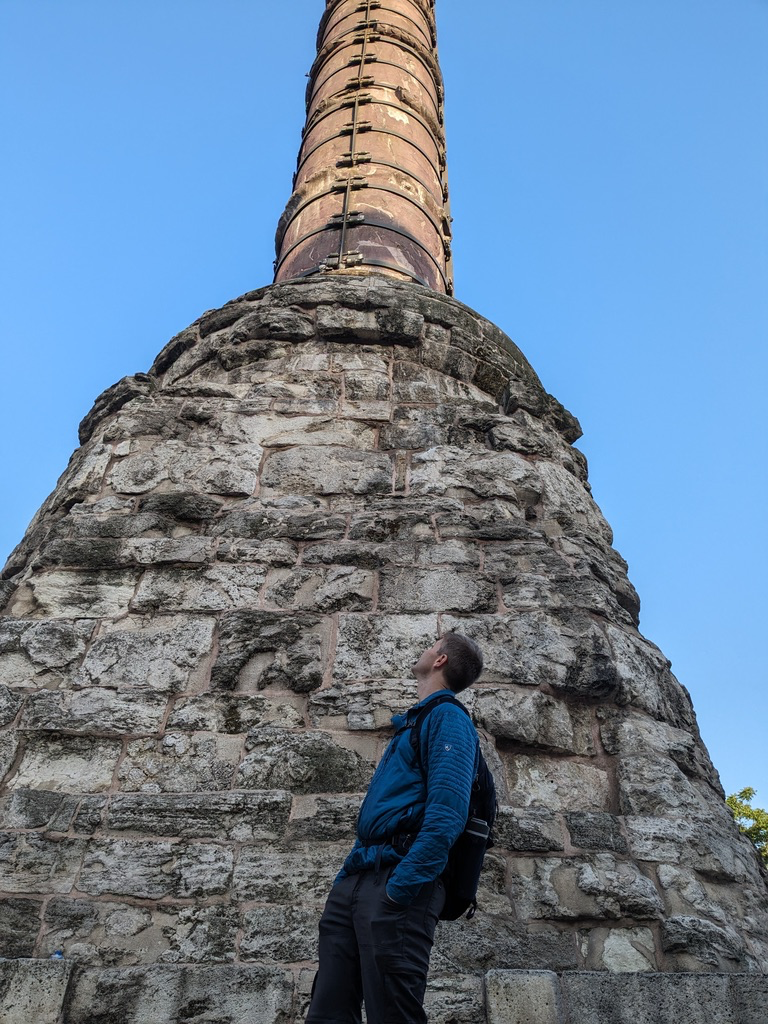 This is me, visiting the Column of Constantine, a monument to honor Constantine I, built in 330 C.E. in what is now Istanbul.
She asked her students, “If you left a monument to represent your legacy, what would it look like?”
The students began by writing reflection essays about the most meaningful aspects of their lives. The project was open-ended, allowing the students to express themselves while reflecting on the types of monuments in history. In their essays, students shared personally meaningful stories, passions and interests.
Designing The Monuments
Students had two options for creating their monuments: they could use papier-mâché to craft a physical monument or they could use 3D modeling software and print one. That’s where I came in to help.
We utilized TinkerCad Classrooms, an incredible fully web-based software compatible with Chromebooks. Students can perform basic operations like moving, scaling, and combining models. There is a built-in library of many shapes, including animals and other common objects. Most students built their models out of the built-in shapes, although a few mixed in other STL files from the open web.
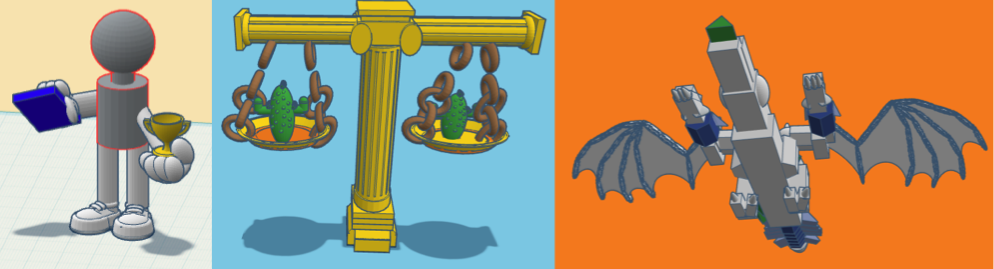 Examples of student monuments - a person holding meaningful objects, the scales of justice, and even a dragon.
The best part about TinkerCad Classrooms is its seamless file management. Students simply join with a class code, and their work is automatically accessible to teachers—no manual saving or sending required. While this might sound trivial if you’re used to Google Docs, finding educational software with this streamlined workflow becomes surprisingly difficult when moving beyond basic text documents, especially for 3D modeling.
Printing the Models
Once students completed their models, I opened them up on my home computer. If a model looked particularly large or gnarly, I tried to adjust it - usually by scaling it down to something that would print in less than an hour.
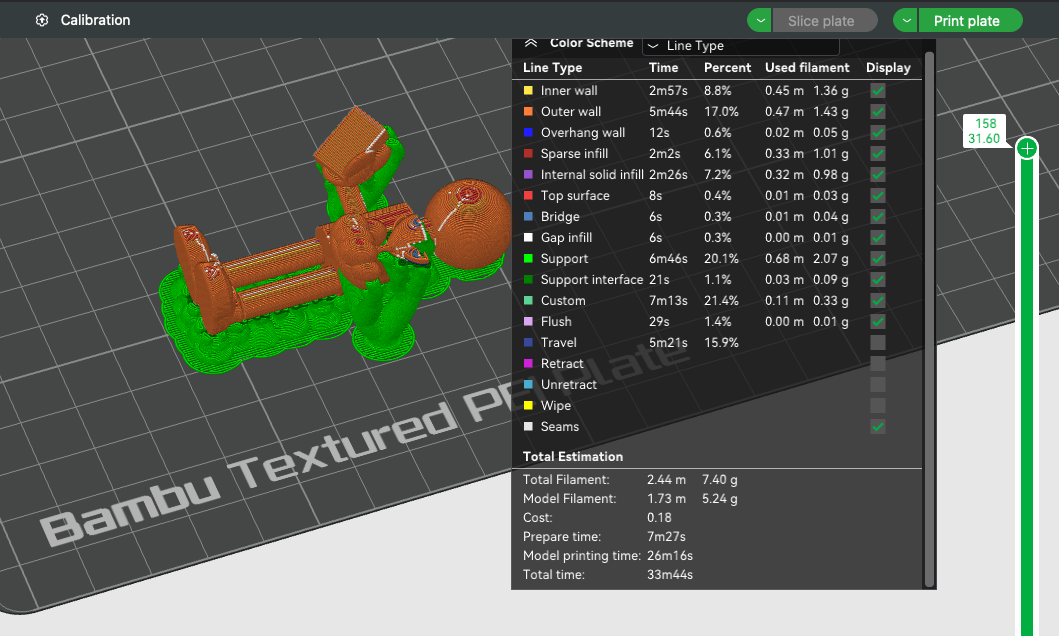 Bambu Studio makes it easy to scale or rotate the models. You can also predict how long it will take and how much filament will be used.
I also needed to split some models apart and then left the students to glue them together. (3D printing involves plenty of trial and error!)
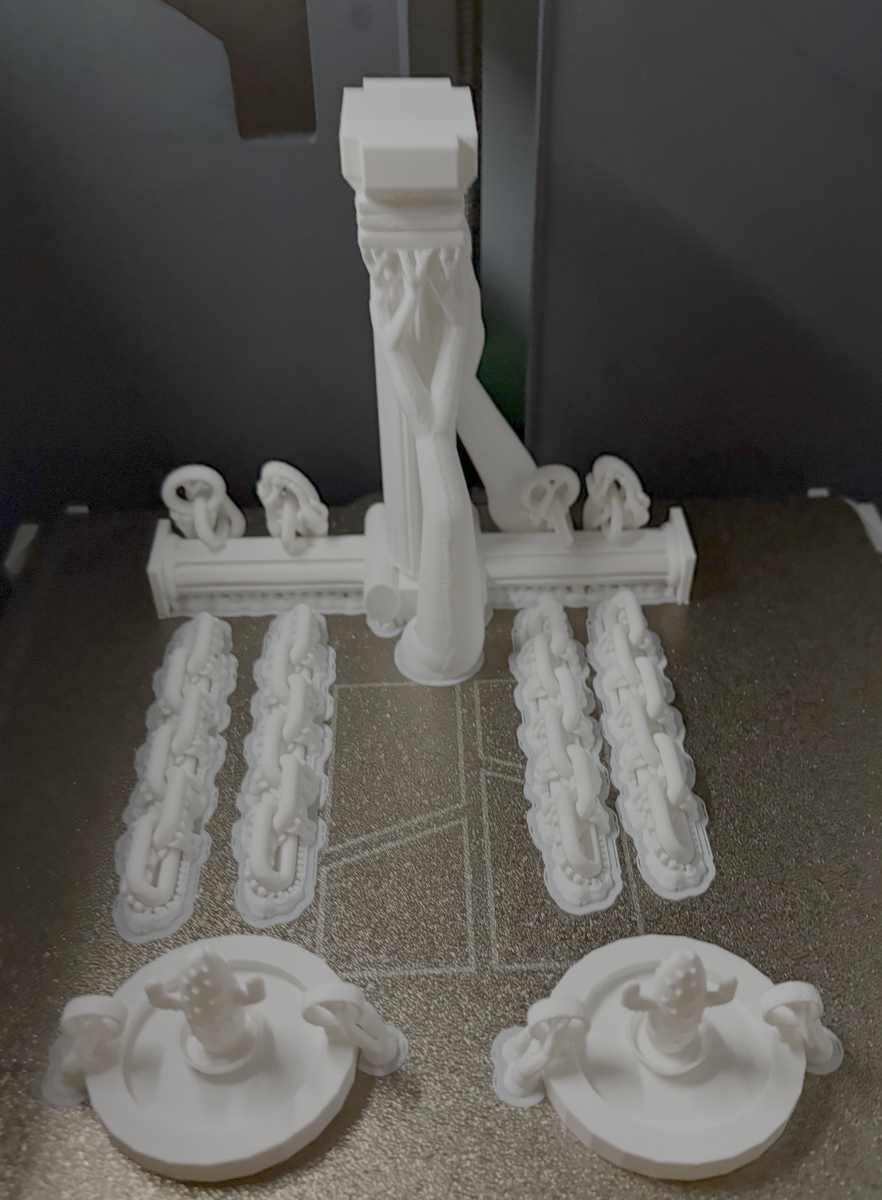 Models may need to be separated into different components so they can print correctly, even with support.
Each print can take anywhere from 30 minutes to a few hours, so they needed to be done over a few days.
Painting the Models
I printed the models on mainly white filament, which gave students a chance to paint them afterwards. Acrylic paint worked quite well and was easier, faster and more precise than it would have been with colored filament.
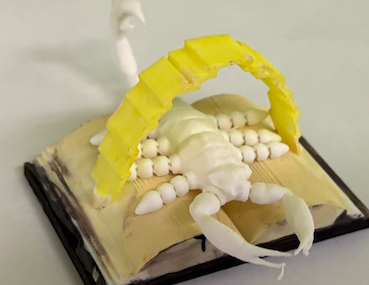 This monument incorporates a scorpion on top of a book, representing well-guarded knowledge
 The dragon turned out really well!
In the end, students’ work was displayed along with their essays. Their monuments are displayed in the main hallway for everyone in the school to see.
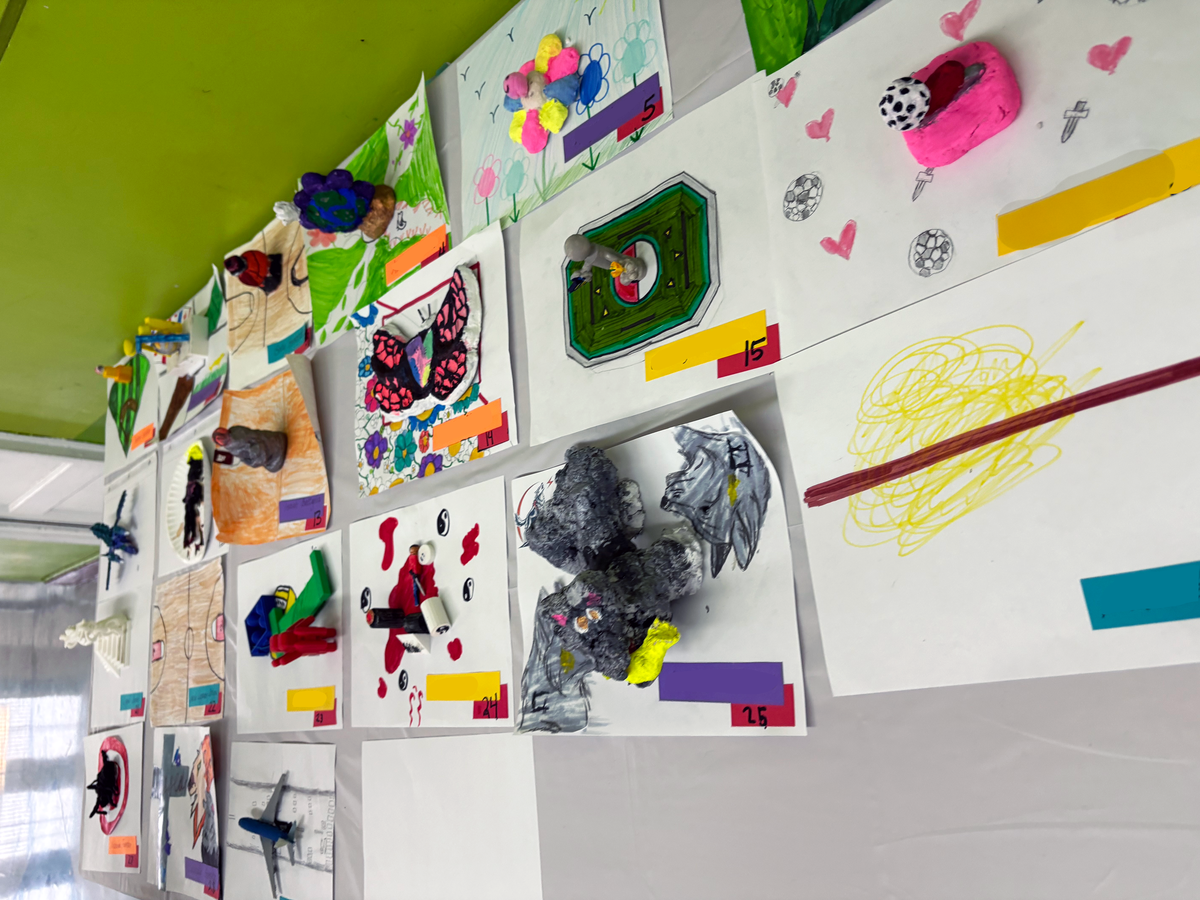 Students shared their classroom projects
Expanding the Program
Students in other classes have begun asking: when can we print something? This week, I brought my printer in for a STEAM night workshop in which students from 2nd to 8th grade tried their hand at 3D modeling. If we can line up a 3D printer to live at the school permanently, hopefully more students will be able to participate in the future!
Lessons Learned
Keep these lessons in mind for your own classroom 3D printing activity:
-
Get a Bambu. Bambu Labs is the leading printer on the market today. I researched several models, including the Prusas, but I agree with Shop Nation video recommendation to go with Bambu Labs for future purchases. As he points out, “it just works”. Bambu offers a range of models, from the starter A1 as low as $429 up to the X1 Carbon for $1,299 - the higher price means more bells and whistles but both have a reputation for quality.
-
Make it Personal. I was surprised by how engaged students were in making something that was personally meaningful. You can build fairly simple, yet meaningful art pieces. Other teachers have recommended variants such as this Personal Crest Project as well.
-
Use TinkerCad Classroom. Students can work on their own pieces. TinkerCad is easy to learn yet still powerful enough for more intermediate to advanced use cases (like articulated dragons). And it has excellent classroom support for schools.
-
Have kids help each other. Some students will find it easier to navigate the software - in which case, it’s much easier to have them help each other. It provides a great opportunity to build leadership skills.
-
Be Prepared To Debug. While the Bambu printers are generally quite reliable, they do sometimes require some support. For instance, when I brought mine into the classroom, the extruder clogged up and I needed to take it home to resolve. It’s good to have at least one person who becomes fairly familiar with the machine and help resolve any potential difficulties.
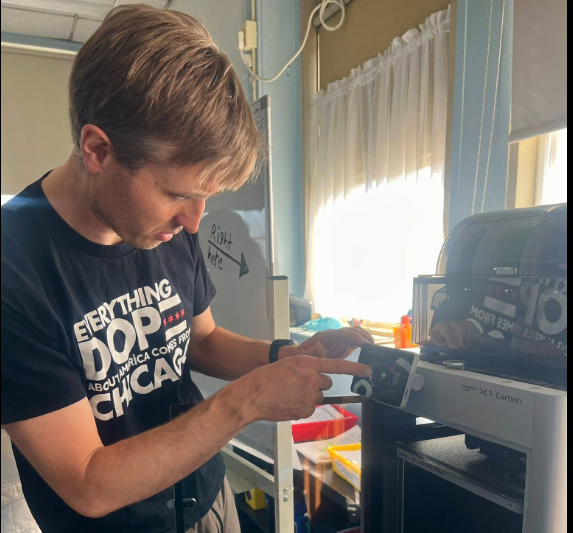 I’m trying to fix a clogged nozzle while kids ask for their prints
Over the past few years, I’ve thoroughly enjoyed collaborating with the school to introduce technology through the robotics team. I’ve hosted a coding club and provided support to classes whenever they seek to incorporate technology into their classroom experiences.
There’s something special about handing a kid a piece of artwork they designed, but made of durable plastic that can last.
“Curious about doing something similar? Whether you’re a teacher or someone who wants to help schools, I’d love to connect. Feel free to reach out on LinkedIn.