What I learned from my first robot competition
February 05, 2019
I entered a robot battle. Yup, that’s a thing that happened.

My friend Gursimran and I have been coaching a middle school robotics team for a while, but we thought - why should the kids get all the fun? So when we saw a post for Robot Riot, the “backyard wrestling” version of Battle Bots, we took the opportunity to dive in.
It’s not like either of us have ever built any sort of electronics before. We are software engineers, we didn’t even know how to get two wheels to move. But with the help of Youtube and random Googling, we quickly figured it out. Over the course of six weeks, we moved from cardboard-and-duct-tape prototypes to a reasonable box robot that sort of held its own in at least one of the two fight rounds.
For our first battle, we got caught in “The Net”, a clever robot that extended a ping pong net to ensnare opponents. Our flipper arm didn’t work and our wheels spun uselessly while we were trapped.
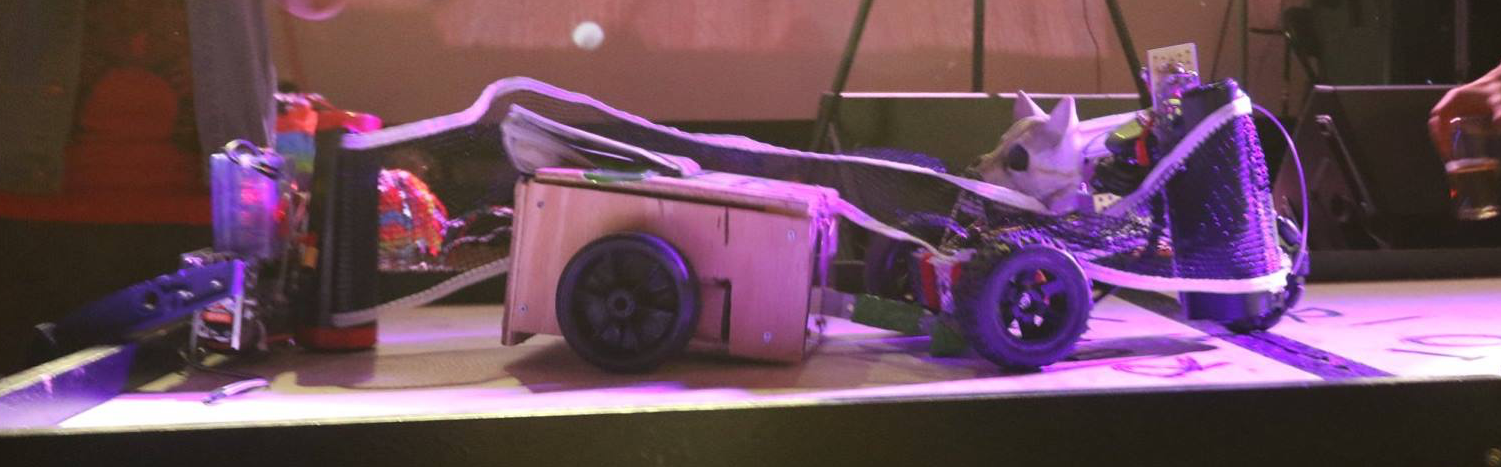
Our next battle was against a piñata that shits Starbust. As you can see below, G didn’t knock it off despite multiple attempts to penetrate from behind.
Here’s my four lessons for future Robot Rioters from my first battle:
Keep it simple
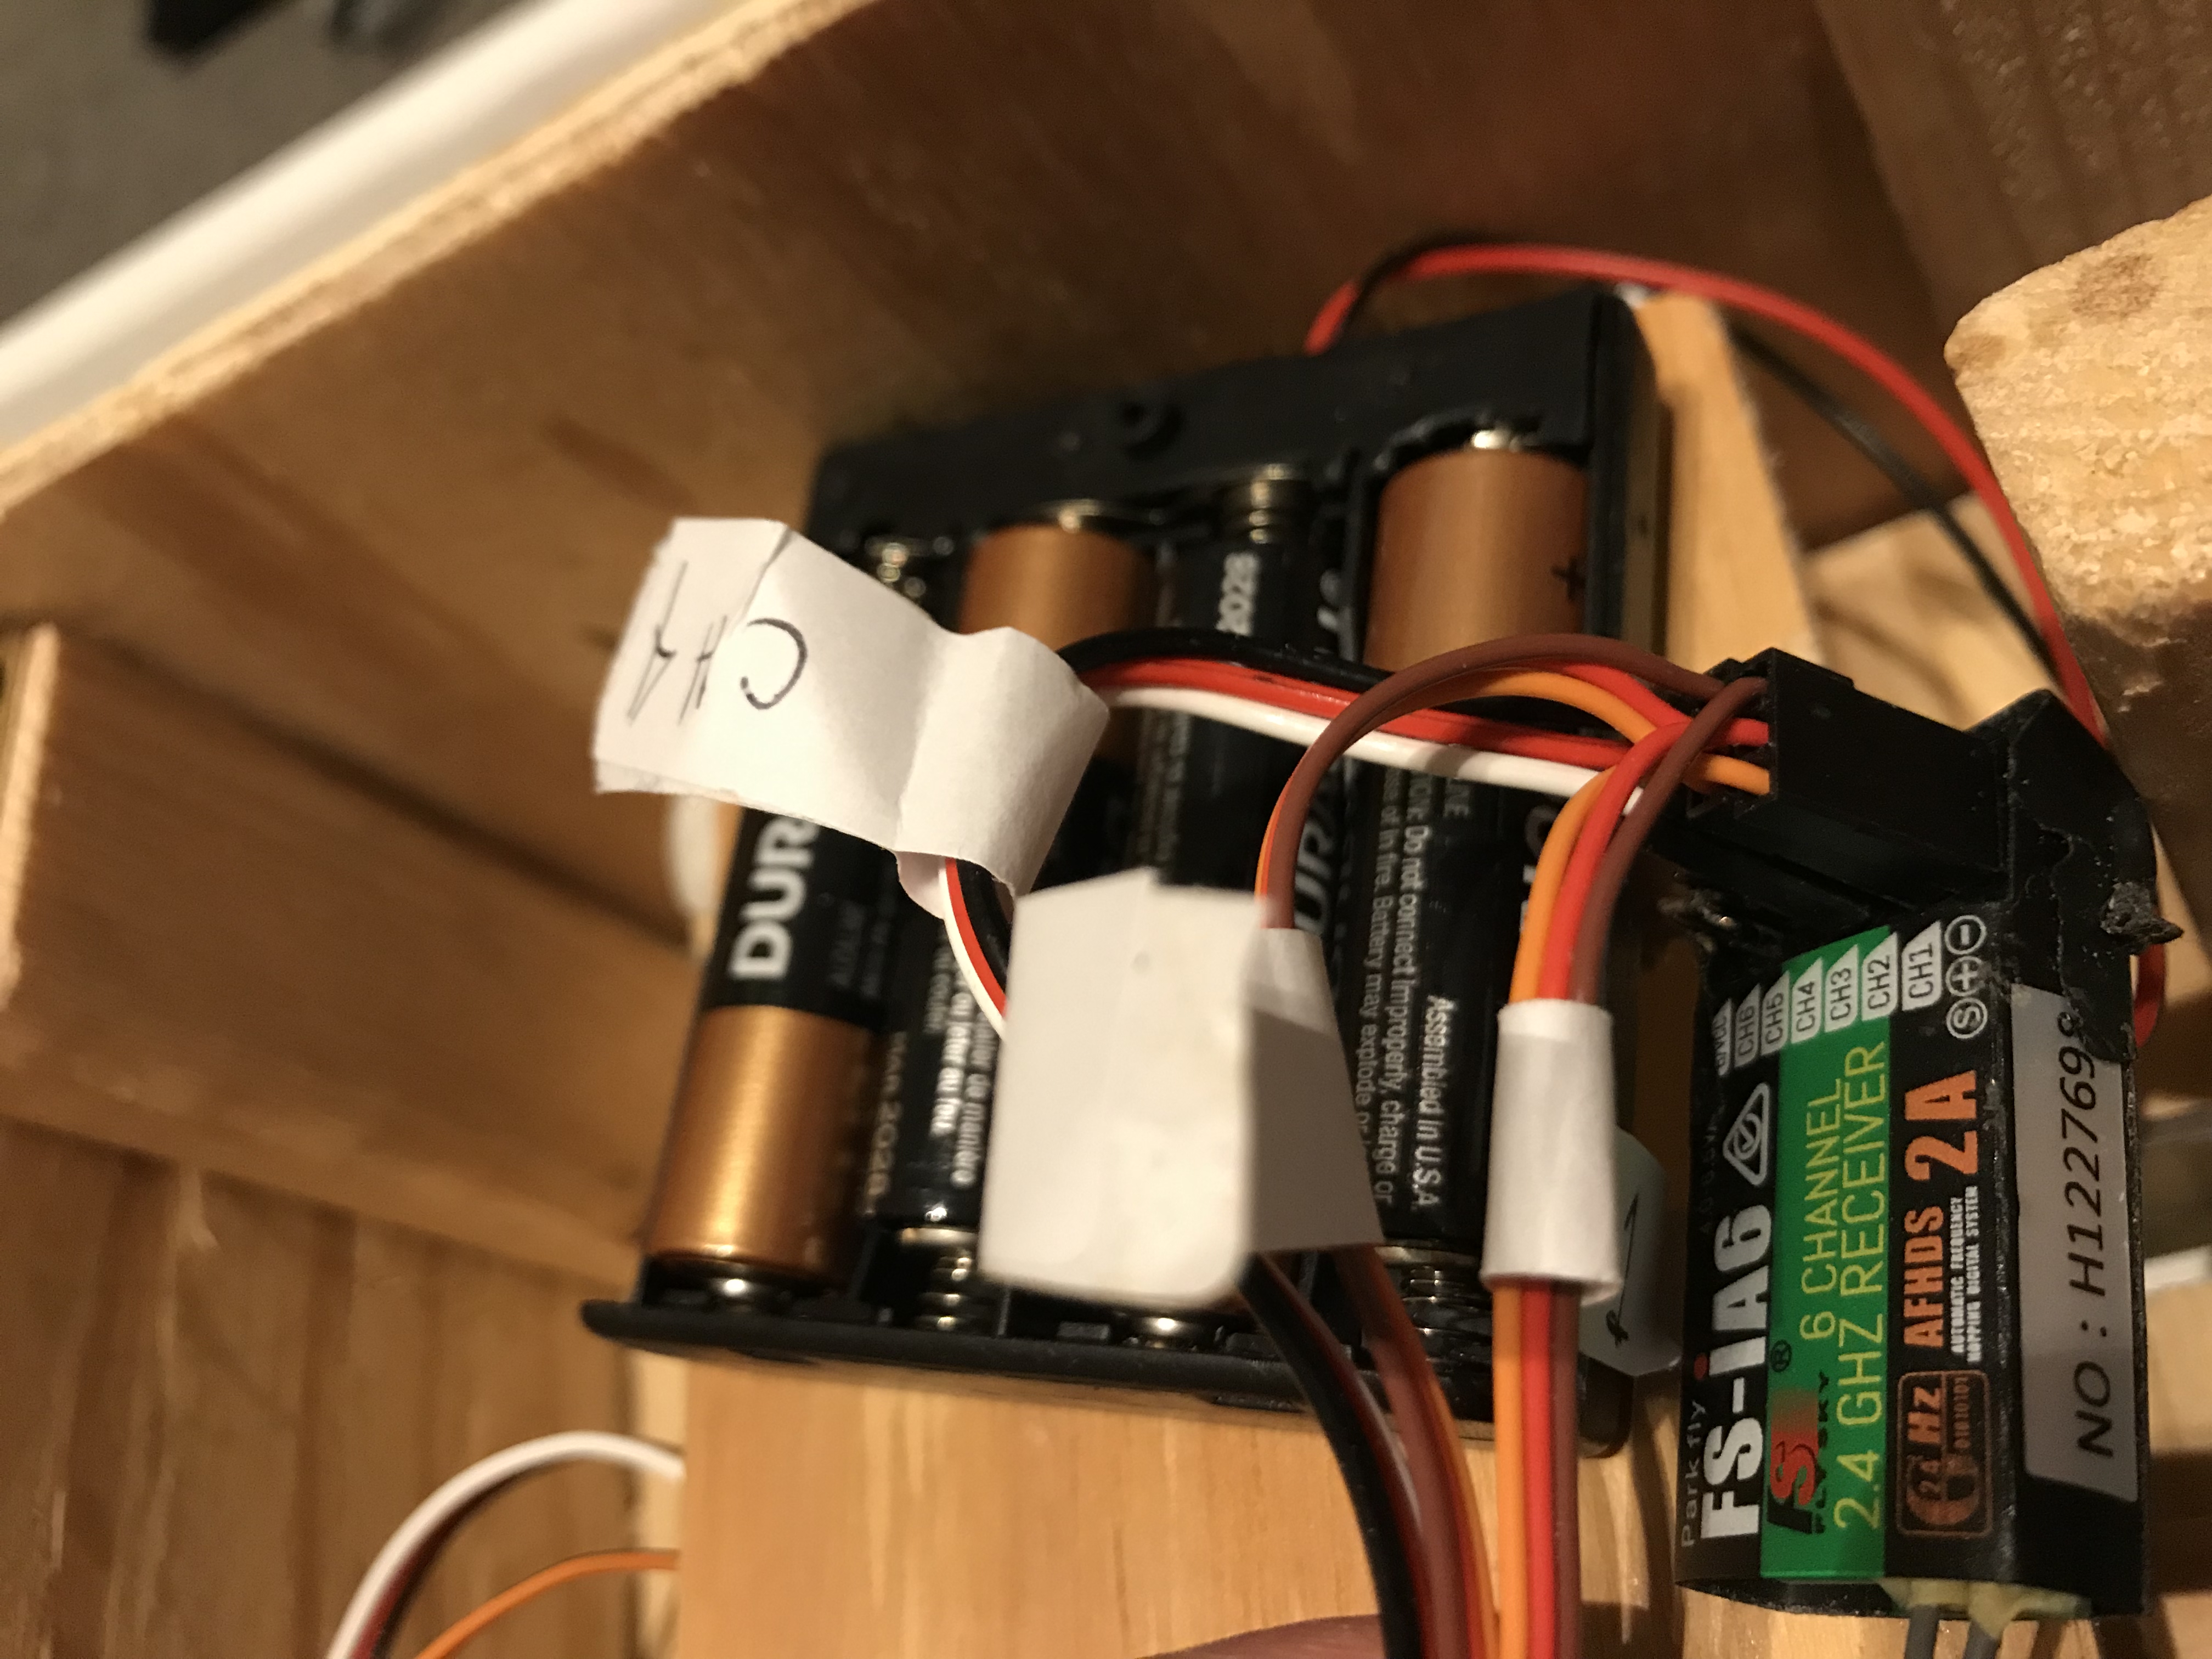
Many robots are powered by a microcontroller, such as Arduino or a Raspberry Pi. While these systems give incredible flexibility and control, they also require a level of understanding of basic electrical engineering that I don’t have and didn’t want to learn on such short notice. Many build-your-own-robot kits use “simple” DC motors but still require controllers to manage speed and power. We were cobbling this together with simple online tutorialS and even that was a step too far.
The simplest way to get started, it turns out, is to use servos. Servos are self-contained devices that include their own circuitry to control precise speed and movement. We could just plug the servos directly into a radio receiver for an RC helicopter. This required no soldering, seemed pretty safe and most importantly, it just worked out of the box.
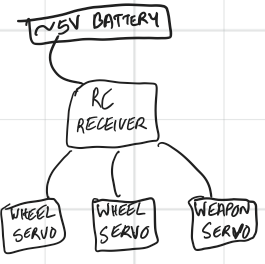
The other advantage is that we used a simple battery pack with 4 AA’s - which avoided us getting electrocuted on anything more powerful. Next time, though, we will be eyeing those lithium ion batteries…
The first time that the servos started spinning on Gursimran’s kitchen table, we both gave a shout for joy! With basic movement solved, the rest seemed easy - we just needed to attach some wheels, build a weapon, and put it all into a chassis.
Wheels: a sticky situation
The hardest part of building the robot was connecting to the wheels. The servos come with these tiny connectors that attach via gears. They have very small holes that are intended to be connected with very small screws. Turns out, though that it’s quite hard to find screws that small! Neither Home Depot nor Micro Center had what we needed.
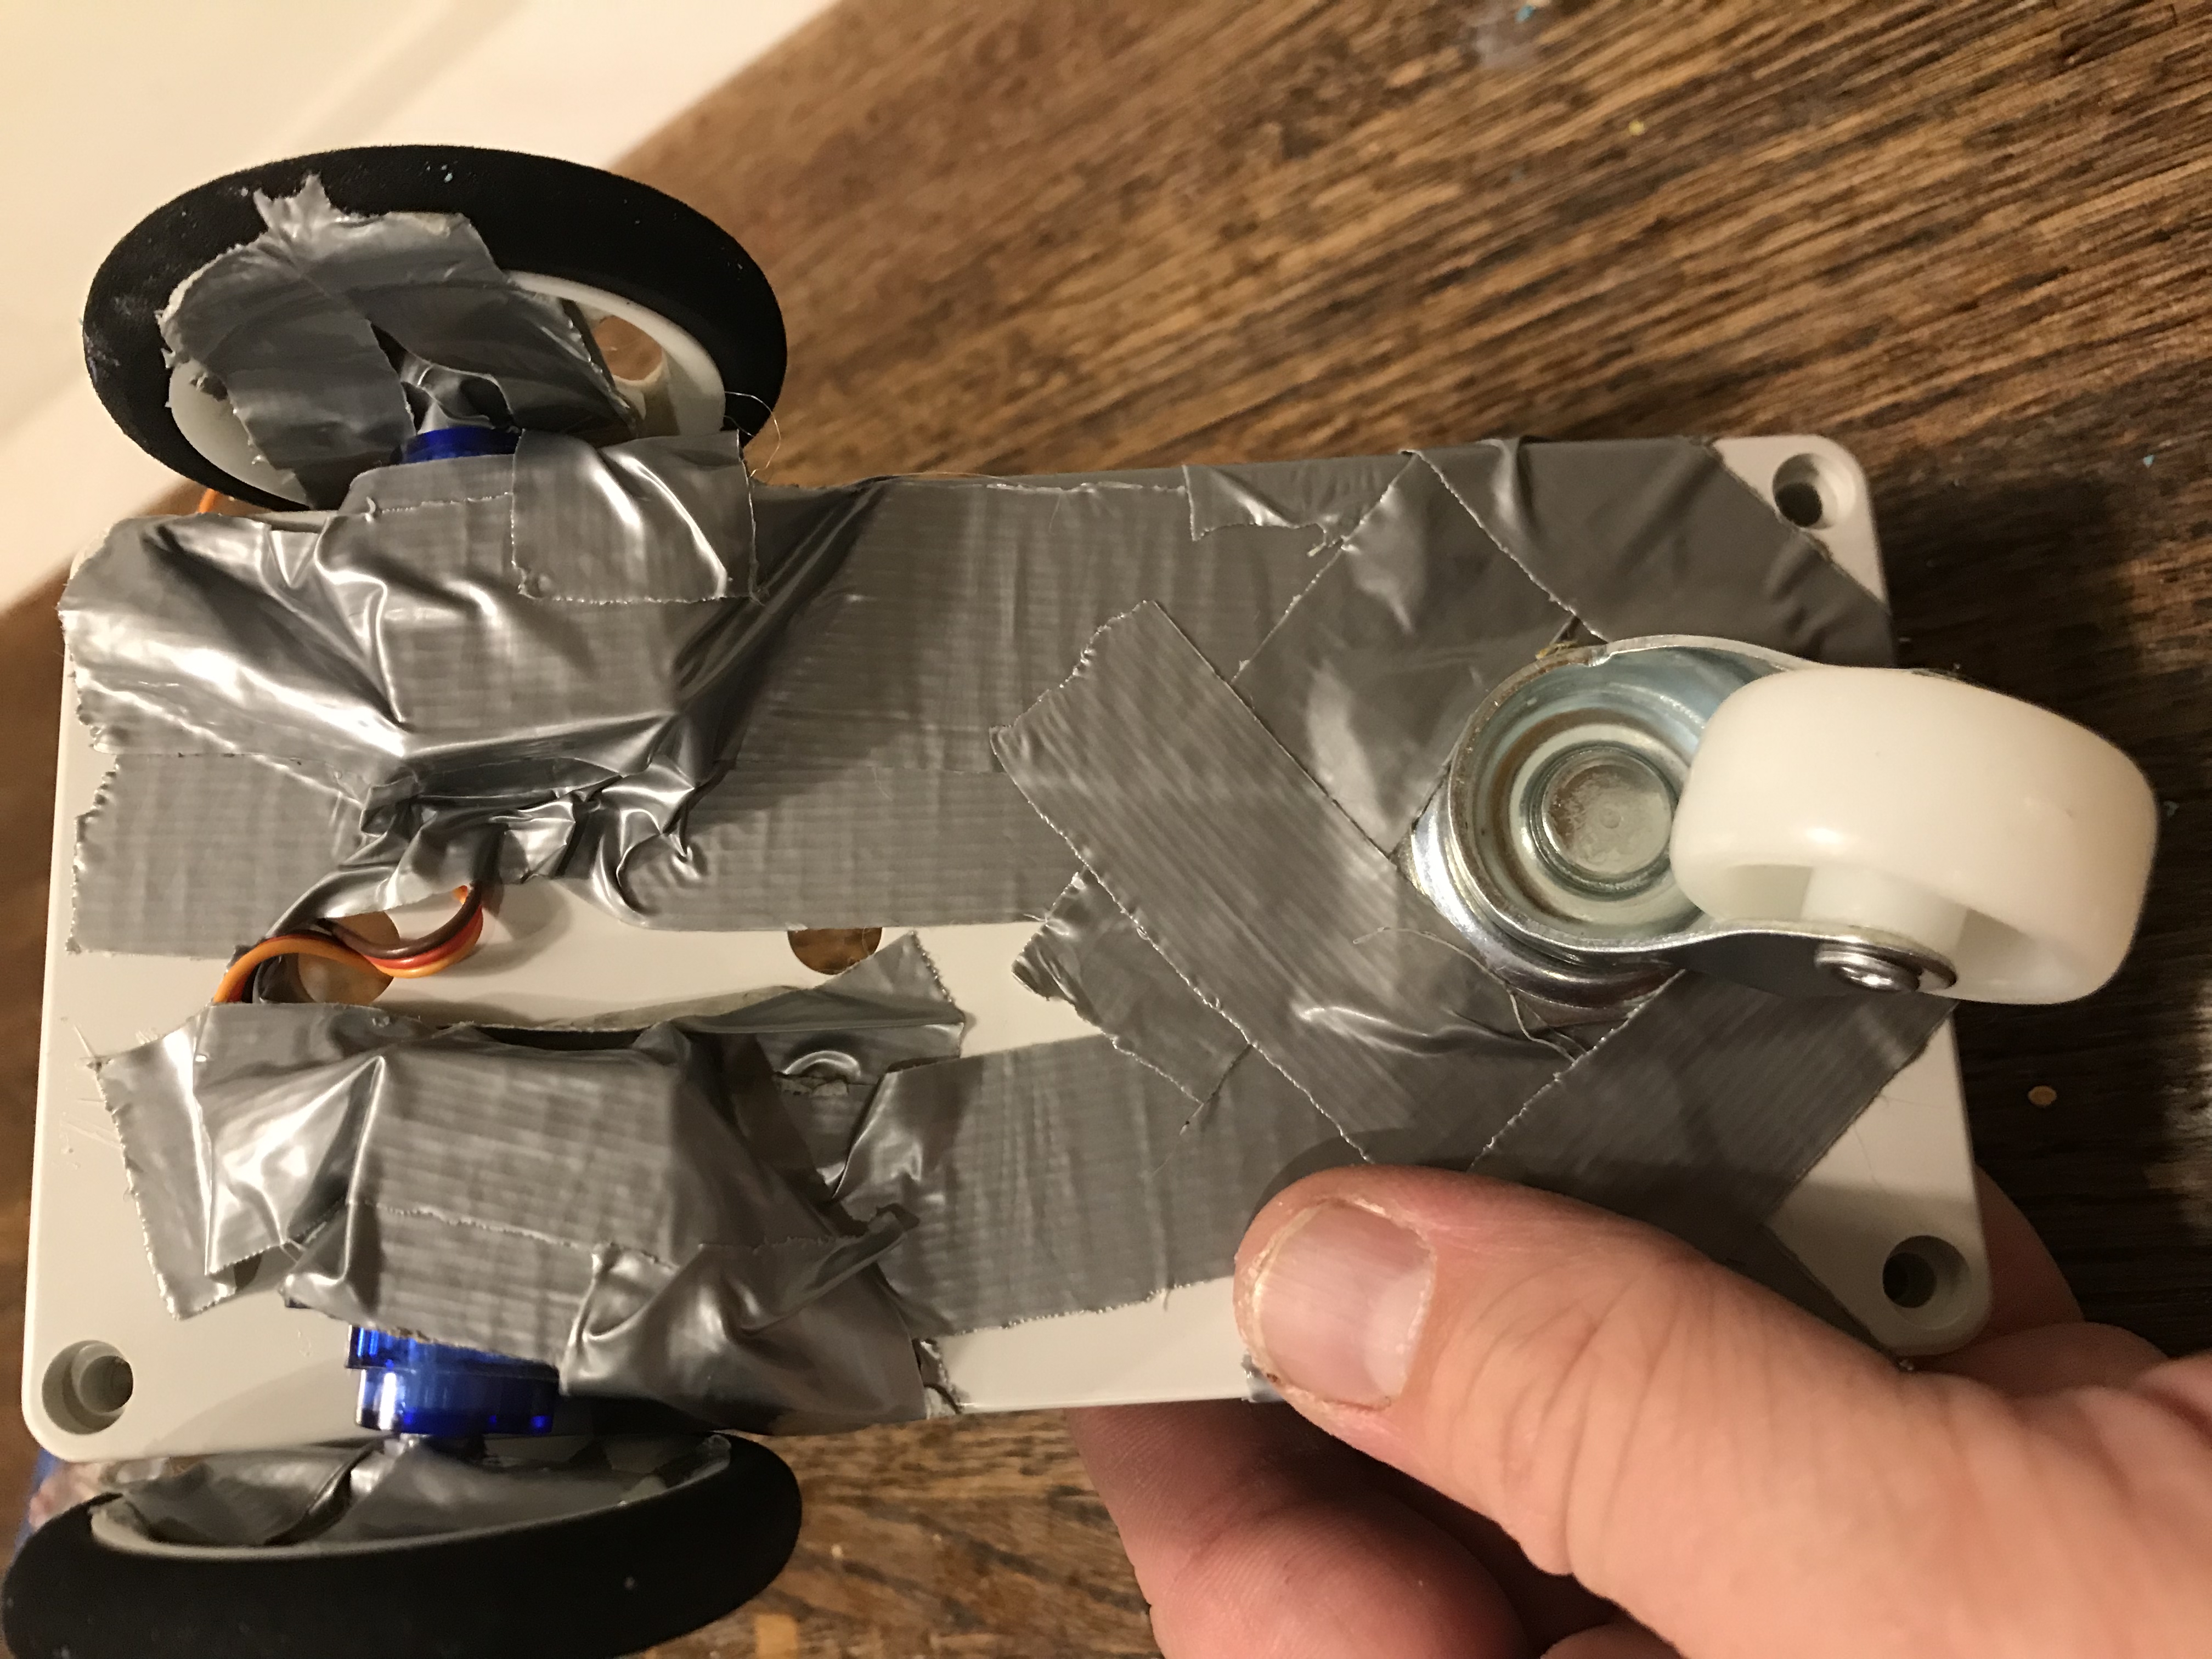
I assembled the first prototype using duct tape and … that’s it. And it “worked” about as well as you’d expect - which is to say that it could wobble around in circles but quickly fell apart.
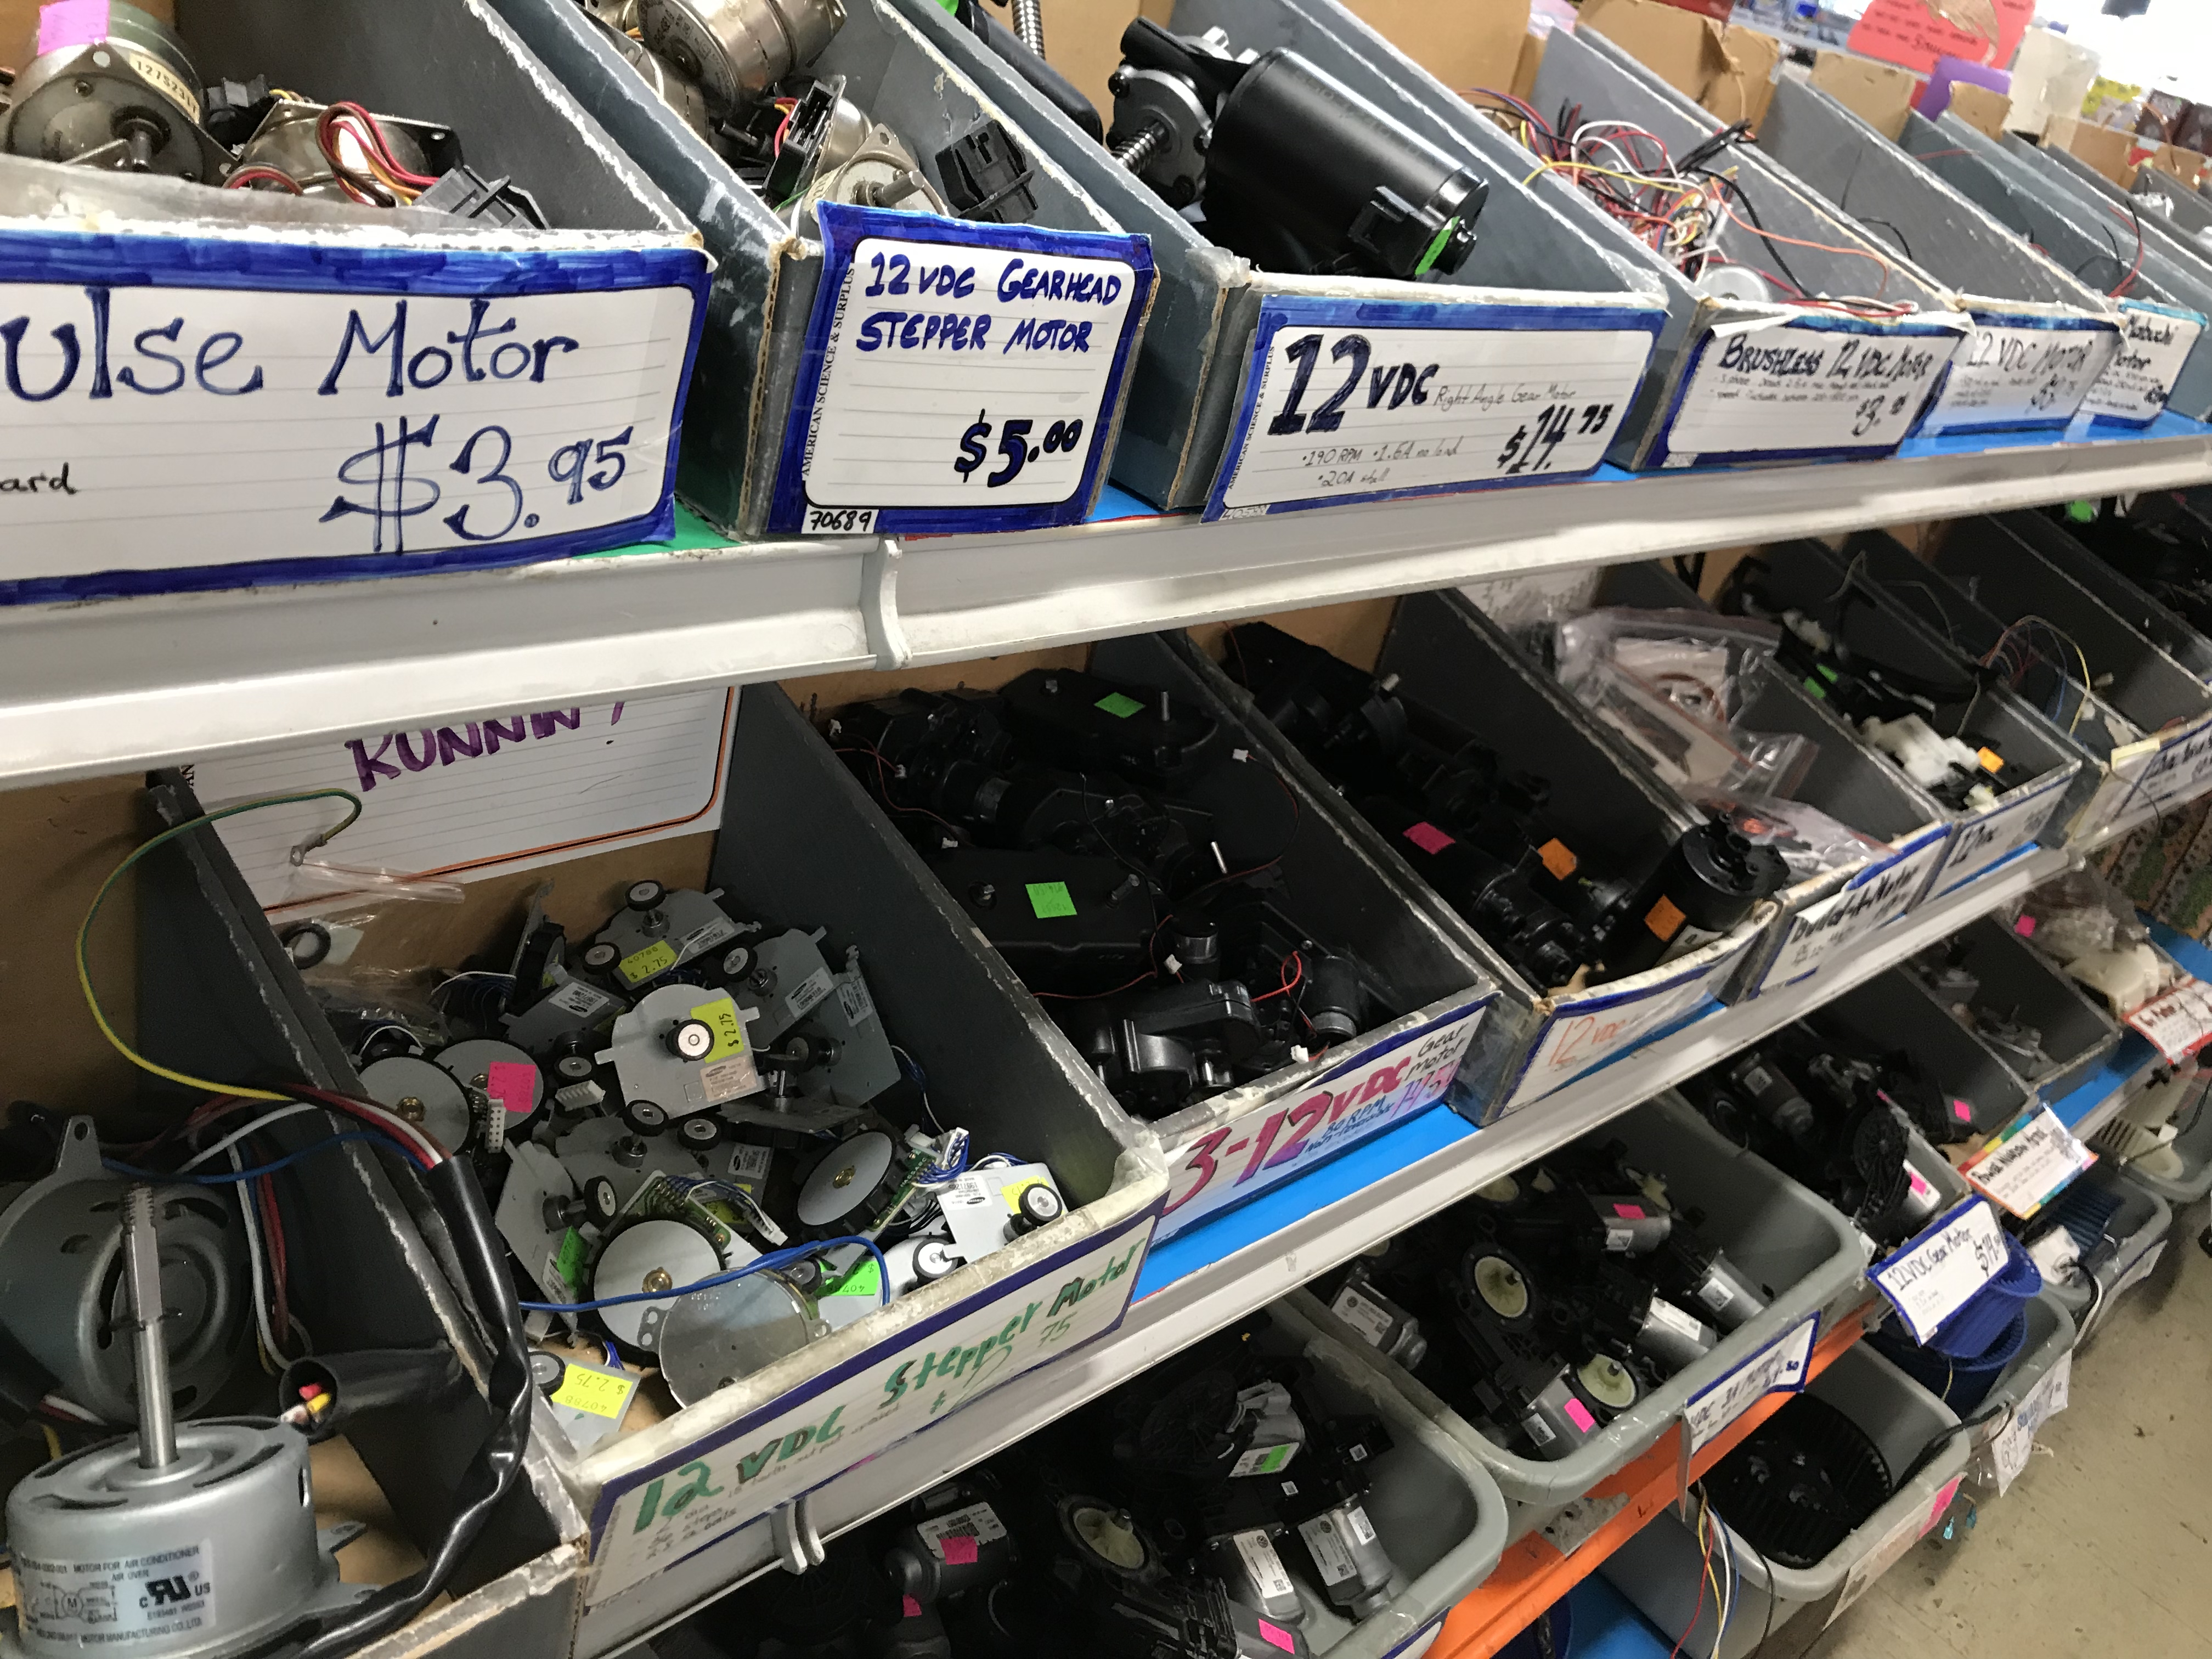
So we went shopping for wheels. American Science & Surplus is a fun store with a huge assortment of lots of fun things (but still no tiny screws). I found some wheels that looked good but still had no way to attach them. Finally we found a small wheel hub at Robot City Workshop, and with some extra turns on the hex stud to dig into the plastic servo we had wheels that mostly attached reliably.
At the competition, we discovered that even though our wheels had reasonable traction for movement, they slipped a lot once the robot tried to push anything. Our motors had plenty of torque, but the wheels just spun. Next time we will look closer at using really sticky wheels that can provide friction to push other robots off the table.
Do we really need to put it all in a box?
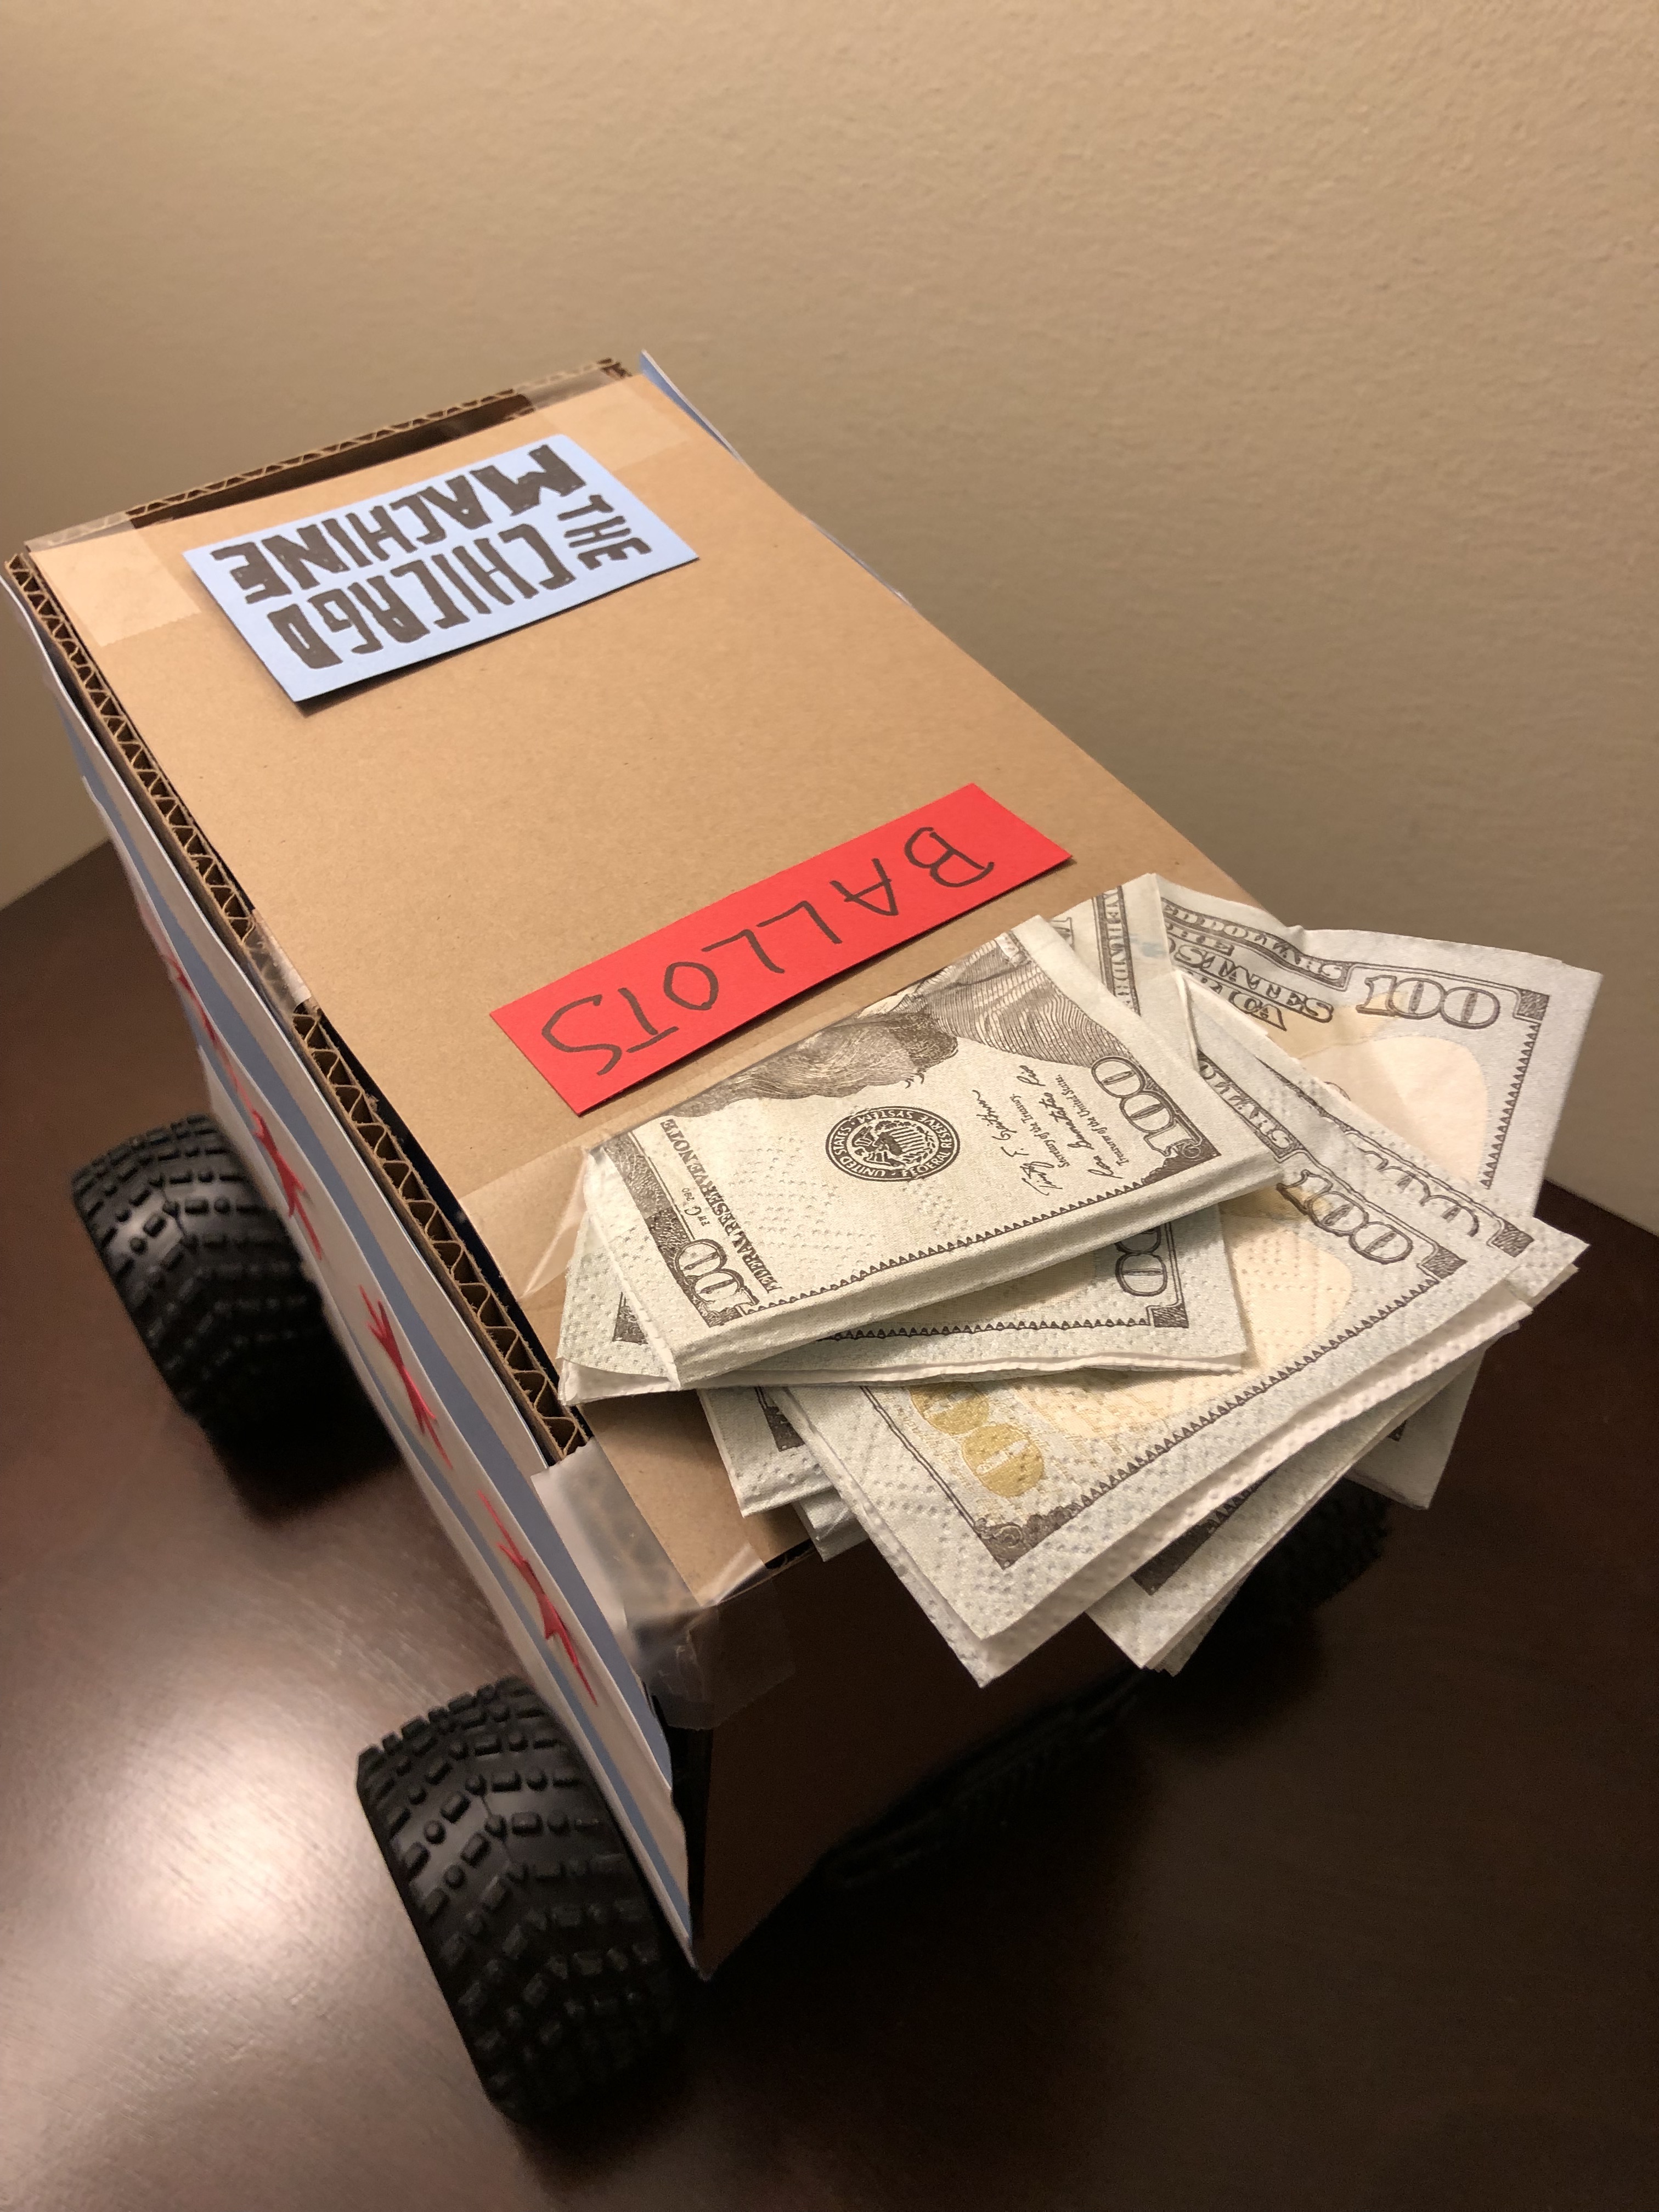
I figured that we would build a basic box robot with two wheels, so a ballot box made sense to convey the general theme without needing to get into particulars. I think the box performed pretty well. However, I noticed that most of the other robots didn’t even get that far- many were held together with zip ties and, in one case at least, tupperware. I assumed that robots needed to have a “body” but I think that was incorrect.
For the theme, we went with some political commentary … since we have a mayoral election coming up, in which the leading contendors are either related to former machine bosses or have hired their children, figured it’s as good a time as any to point out. A fake ballot box stuffed with dollars seemed to convey the general idea nicely…
I do not know how to weld or anything, so for the actual robot we used mostly old fashioned woodworking. I can operate a drill and a hand saw and that was generally sufficient. For next time, I’ll likely look into aluminum chassis from Actobotics or similar, as I think it’ll be even easier than wood once I have the parts.
We did, however, successfully use a 3d-printer to create the wedge for the weapon. The wedge wasn’t that effective but it did go up and down and was fun to drive around.
A transparent society
It was fantastic to work with Gursimran. We have worked together for years and he tends to be very good at experimenting with new tech and discovering ways to do things, while I try to tie it together. That’s how we split it up this time.
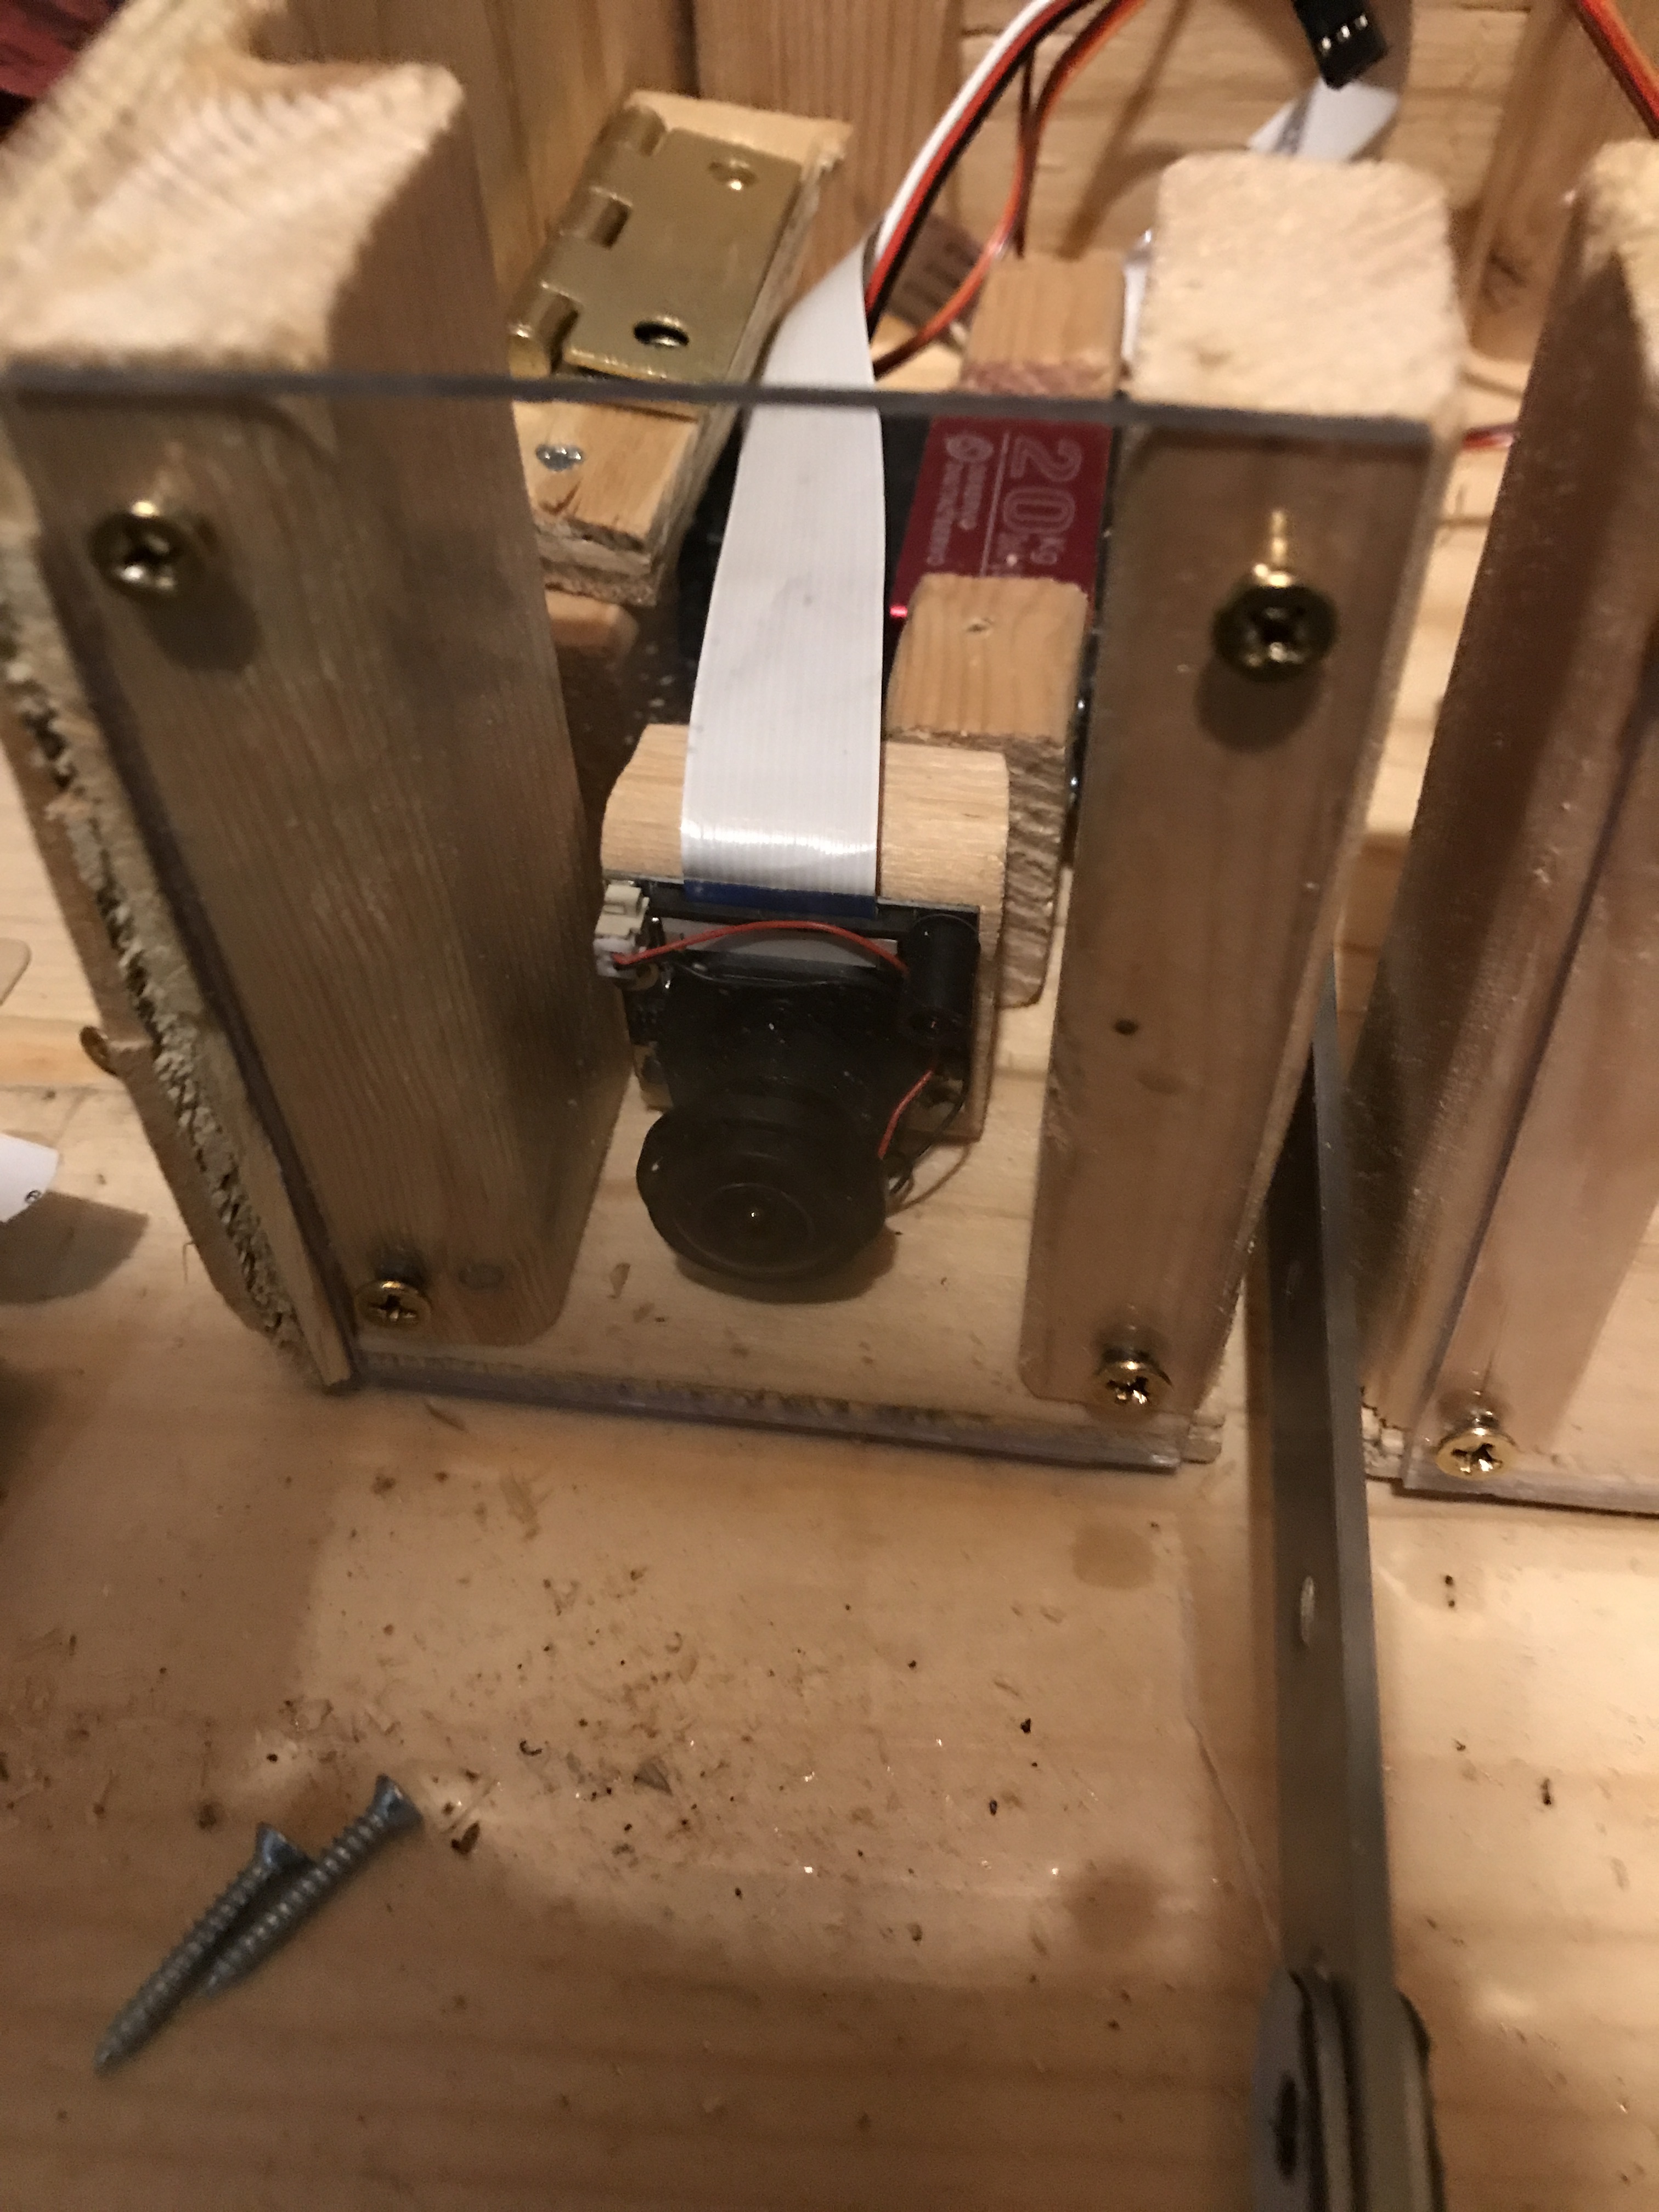
One of our bolder ideas was to live stream the fight from the robot’s perspective. To that end, we built a whole enclosure for a camera, attached to a Raspberry Pi, and connected to a hotspot. The stream went to Twitch, and there was a whole website to allow for the crowd to view and vote on it. It was awesome.
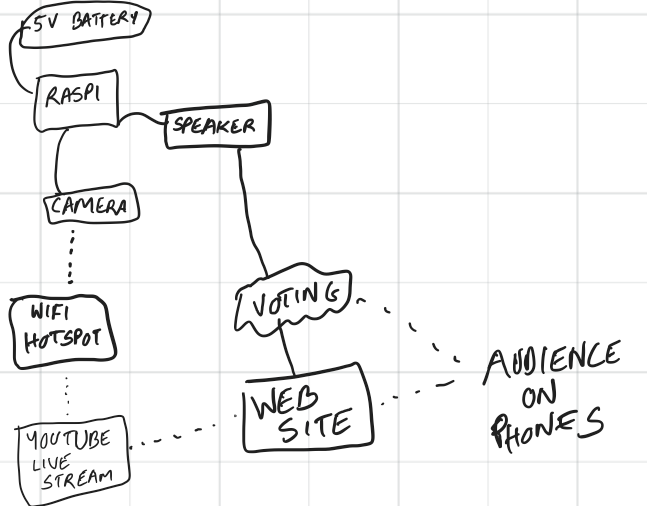
Of course, it all fell apart onsite - the internet in the bar wasn’t strong enough and so we ripped it out at the last minute. You should, however, check out the code on his Github page, which details the architecture.
But it didn’t matter - we still got to drive a real robot in a real battle and we didn’t get knocked out, so I chalk it as a huge success and we are looking forward to the next battle!
Until next time!
The Chicago Machine was a fun intro robot but I realized many of the limitations of such a simple design. Next time, I’ll be upgrading to a proper Arduino microcontroller, stronger motors, stickier wheels, and a better theme. I’ve even picked up a Pixpro camera to see if we can incorporate some self-driving into it … stay tuned!